Recycled crafts for kids can turn an ordinary afternoon into something lovely, with nothing more than an empty cereal box, a few crayons, and a little imagination. Before you put that cardboard packaging in the recycling bin, it might have one more adventure waiting for it.
A box can become a tiny town. A paper bag can become a puppet with a very dramatic personality. Yesterday’s newspaper might turn into a garden full of flowers.
These activities can stay simple and relaxed. You don’t need expensive supplies or a picture-perfect result. You just need a safe place to make a little mess and permission to see what happens.
Why Try Recycled Crafts for Kids?
There’s something inviting about a pile of everyday materials. Unlike a craft kit with one expected result, an empty box leaves plenty of room for a child’s own ideas.
Your little one might decide that the house you suggested should actually be a dinosaur hospital. That’s part of the fun.
These activities also give children opportunities to practice cutting, drawing, folding, and figuring out how things fit together. You can introduce the idea of using something again before throwing it away, without turning craft time into a lesson.
Technically, most of these projects involve reusing materials rather than recycling them into new raw materials. For young children, “What else could we make with this?” is a simple place to start.
What to Save for Your Craft Basket
You don’t need to keep every piece of packaging that comes through the door. A small basket or shelf is enough.
Look for clean, dry materials such as:
- Cereal boxes and other lightweight cardboard packaging.
- Plain delivery boxes with staples and loose tape removed.
- Paper grocery bags.
- Cardboard tubes from kitchen paper rolls.
- Old magazines, newspapers, and used wrapping paper.
- Scrap paper and greeting cards.
- Clean plastic food tubs with smooth, undamaged edges.
Add age-appropriate crayons, washable markers or paints intended for children, suitable craft glue, and scissors matched to your child’s abilities. An adult should handle cutting whenever a child is not ready.
Keep the collection manageable. When the basket is full, use what’s there before saving more. Craft supplies shouldn’t become another pile you feel responsible for organizing.
A Few Safety Checks Before You Begin
Check every item before handing it to your child. Skip glass, sharp metal, damaged plastic, staples, and packaging that held medicines, cleaning products, or other hazardous substances.
Avoid small decorations such as buttons, bottle caps, beads, and loose googly eyes around children who may put things in their mouths. Draw faces and details instead.
Keep plastic bags, long strings, and cords out of the activity. Adults should manage craft knives, hot glue, and difficult cutting, with those tools kept away afterward.
Use age-appropriate art supplies and supervise throughout. A project suitable for an older child may need changes when a younger sibling is nearby.
Choose supplies in their original, labeled packaging and follow the warnings and instructions. “Washable” describes cleanup, not whether something is safe to swallow. Even products labeled non-toxic belong outside the mouth. Avoid unlabeled leftover paints, solvents, and adult hobby materials.
Wash hands after making crafts and keep food and drinks separate from glue and paint. If your child still mouths materials, stay closely involved and offer fewer, larger pieces. Pause if the activity becomes mostly chewing or eating the supplies.
Choose the Version Your Child Can Manage
| Your child’s current skills | A manageable starting point |
|---|---|
| Interested mainly in touching and making marks | Color a clean box or make marks on a large cardboard sheet with close supervision. |
| Able to place and press large pieces | Stick precut paper shapes onto a house or collage. |
| Comfortable tearing or using suitable scissors | Prepare collage pieces or large flower shapes. |
| Able to follow an over-and-under sequence | Try a few broad strips for paper weaving. |
These are practical starting points, not developmental tests. Adjust the activity to the child in front of you, and keep adult-only tools separate even when several ages are crafting together.
8 Simple Craft Ideas Using Everyday Materials
Choose one idea that suits your child’s interests and the supplies you already have. There’s no need to work through the whole list.
1. Cereal Box Houses
You’ll need: An empty cereal box, scrap paper, crayons, glue, and scissors.
Close the box and let your child cover or decorate the outside. Draw a door, windows, a roof, and anything else their house needs.
An adult can cut a door that opens, away from the child’s hands, but drawn details work just as well. Place several boxes together to make a neighborhood, with paper roads running between them.
Ask, “Who lives here?” Your child might give you a whole story before the glue has dried.
Make it easier: Offer a few large paper shapes to stick on as windows and doors.
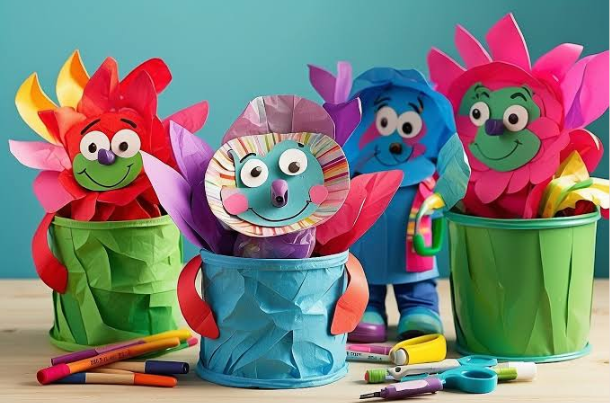
2. Paper Bag Puppets
You’ll need: A clean paper bag, crayons, scrap paper, and glue.
Lay the bag flat and draw a face near its closed end. Add paper ears, hair, wings, or a hat, keeping decorations large and securely attached.
Use a small hand-sized paper bag for the puppet, keep it away from the face, and do not let children put bags over their heads. Once everything is dry, your child can put a hand inside and bring the character to life. A puppet doesn’t need moving features to be entertaining.
You might make a sleepy bear, a cheerful monster, or a character from a favorite book. Then let your child decide what happens next.
Try this: Use another box as a little stage and take turns telling a very short story.
3. Cardboard Tube Binoculars
You’ll need: Two kitchen paper roll tubes cut to a comfortable length, paper tape, and crayons.
Let your child decorate the tubes before an adult tapes them firmly together side by side. Leave off the neck strap.
The binoculars won’t magnify anything, but they make pretend exploring feel special. Look for birds through the window, spot colors around the room, or search for a teddy bear you’ve hidden nearby.
Remind your child to stop walking before looking through them, and never use them to look toward the sun.
Make it simpler: A single tube can become a pretend explorer’s telescope.
4. Magazine Color Collages
You’ll need: Old magazines, scrap cardboard, glue, and scissors if appropriate.
Choose a color and search the pages together. A blue sky, a blue coat, and a picture of the sea can all belong in the same collection.
Children can tear out pieces instead of cutting them. Spread glue over a section of cardboard and arrange the pictures in any order.
Younger children may enjoy placing overlapping scraps. Older children might create a rainbow, a landscape, or a picture made entirely from shades of one color.
A gentle prompt: “Which piece would you like to put down first?” leaves the decisions with your child.
5. Newspaper Flowers
You’ll need: Newspaper, scrap cardboard, crayons or washable paint, and glue.
Draw large flower shapes on newspaper. Cut them out yourself or help your child use suitable scissors.
Color the flowers, then glue them onto a cardboard background. Add stems and leaves with crayons or broad strips of paper.
The printed words can remain visible through the color, giving each flower a different look. There’s no need to cover every bit of newspaper.
For younger children: Offer large, precut petals to arrange around a drawn flower center. Keep pieces big enough for safe handling.
6. Cardboard Box Animal Homes
You’ll need: A shallow box, scrap paper, crayons, and toy animals suitable for your child’s age.
Turn the box into a place for animals to live. Draw grass across the bottom, add a paper pond, or fold a piece of cardboard into a shelter.
Your child might build a farm, a jungle, or a home for an imaginary creature. Keep the scenery simple enough that there’s room to play afterward.
If you don’t have animal figures, draw animals directly on the scene or make large cardboard shapes suited to your child’s handling skills. Avoid small cutouts for children who mouth objects.
Extend the play: Ask where the animals sleep or what they might need when it rains.
7. Scrap Paper Weaving
You’ll need: A piece of lightweight cardboard, broad paper strips, and scissors.
An adult can cut several parallel slits in the cardboard, leaving a wide border intact. Show your child how to pass a paper strip over one section and under the next.
Start with just a few wide strips. This activity is better suited to children who can comfortably manage the movements and materials.
Let the colors and spacing vary. A slightly uneven weaving is still a satisfying piece of work.
If the cardboard is stiff or the child becomes frustrated, use a sheet of paper as the base instead. An adult can demonstrate one pass, then help only with the part that is difficult. There is no need to complete a whole woven mat in one sitting.
For younger siblings: Offer a separate sheet for gluing broad paper strips into a colorful pattern.
8. A Family Cardboard Mural
You’ll need: One large piece of cardboard, crayons or washable paint, scrap paper, and glue.
Flatten a suitable box and spread it across a protected floor or table. Invite everyone to add something.
You could make an imaginary town, an underwater world, or a garden. One child might draw roads while another fills the sky with enormous purple birds.
This is a lovely option when children of different ages want to join in. Give everyone their own space while leaving room for their ideas to meet.
Keep it relaxed: The mural can stay unfinished and come out again another day.
Let wet paint dry before walking near or moving the cardboard. If it is on the floor, keep the surrounding route clear so nobody trips over the edge or slips on spilled materials.
How to Make Craft Time Feel Easier
Craft time can feel more manageable when you start with a simple idea and a few supplies. Choose an activity that suits your child’s age and interests, gather what you need beforehand, and clear a small space where a little mess is okay. You don’t need an elaborate setup, paper, crayons, and a suitable cardboard box may be enough to get started.
Set out less than you think you need
Too many choices can make starting harder. Try offering one main material, a few colors, and glue.
You can bring out more supplies if your child asks. A small setup also makes cleanup less daunting when everyone loses interest unexpectedly.
If your child enjoys turning simple materials into something imaginative, explore more creative play and craft ideas for kids on Tales of Tots. You can choose one easy activity that matches your child’s age, interests, and the supplies already available at home.
Let your child change the plan
You might suggest a flower and end up with a creature that has six ears. Unless there’s a safety concern, let the idea grow.
Leave space for an unexpected creation rather than correcting where every piece should go. You can help with a tricky fold without taking over the whole project.
A box becoming a six-eared creature is part of the fun of letting children explore their own ideas. For more everyday ways to support that imagination, read our guide on how to encourage kids’ creativity.
Give younger children one manageable job
A toddler may enjoy coloring a box while you prepare the rest. A preschooler might prefer tearing paper or spreading glue.
They don’t have to complete every stage to take part. Watching, exploring the materials, and contributing one detail can be enough.
Make cleanup part of the routine
Keep a cloth nearby and have a place for scraps. Finish with a simple invitation: “Let’s put the crayons away together.”
Sorting leftover materials can also become a small conversation. Some clean paper and cardboard may still be suitable for local recycling, while paint, glue, and mixed materials can affect what your service accepts. Check local guidance rather than assuming every finished craft is recyclable.
What to Do With the Finished Crafts
Ask your child whether they want to play with the creation, display it briefly, or save it for another day. A box house might become part of pretend play, while a collage may simply be something they enjoyed making.
You do not need to keep every project permanently. Photograph a favorite if you want a record, then decide together which pieces to keep. Before using a craft as a toy, check again for loose parts, sharp edges, or decorations that have come unstuck.
At cleanup, separate materials where practical and check local collection rules. A cardboard object covered in mixed decorations may not belong in the paper recycling. Reusing something once more is worthwhile without promising that every finished craft can be recycled afterward.
Frequently Asked Questions
What are some easy recycled crafts for kids with very few supplies?
Start with a cereal box house, a paper bag puppet, or a torn-paper collage. Crayons and one clean piece of packaging can be enough.
Choose something that doesn’t require lots of preparation. Your child may have an idea as soon as they see the materials.
What should I check before making crafts for kids using recycled materials?
Check that everything is clean, dry, and free from sharp edges, staples, loose parts, or hazardous residues.
Consider your child’s age and whether they still mouth objects. Stay nearby and use large paper decorations instead of small accessories.
Do recycled art projects for kids have to follow a theme?
No. A theme can help a child who wants a starting point, but it’s optional.
You can simply offer paper scraps, cardboard, and crayons and ask, “What would you like to make?” Some children prefer experimenting with materials rather than making a recognizable object.
Which recycling crafts for preschoolers work well in a group?
A shared cardboard mural, individual paper bag puppets, and color collages are practical choices.
Prepare any difficult cutting beforehand, give each child enough space, and avoid expecting everyone’s work to look the same. Keep the activity flexible so children can finish at different times.
What if my child loses interest halfway through?
You can stop. Put the project aside if they want to return to it, or let the unfinished creation become something to play with.
Craft time doesn’t have to end with a completed object. A few enjoyable minutes together still count.
Are these crafts suitable for toddlers?
Some can be adapted with close supervision, large materials, and adult preparation. Coloring a box or placing large paper shapes may be easier than weaving or cutting. If your toddler mouths everything, keep the setup especially simple and stop if they begin eating the materials.
Can I use any empty packaging?
No. Use clean, dry packaging with a known, suitable history. Avoid anything that held medicines, chemicals, or hazardous products, along with sharp or damaged containers. Check food containers for residues, particularly when allergies are relevant, and skip anything you cannot clean or assess confidently.
Does non-toxic glue mean it is safe to eat?
No. Use supplies according to their labels and keep them out of the mouth. Choose products intended for children and suitable for their age. Washable or non-toxic labeling does not make an art material food or remove the need for supervision.
What if I don’t have glue or paint?
Try drawing on a cereal box, arranging large paper shapes without attaching them, or creating a town from several decorated boxes. You can also use suitable paper tape with help. There is no need to buy more supplies before beginning.
Can the finished crafts go back into recycling?
It depends on the materials and your local service. Some clean paper and cardboard can be recycled, while paint, glue, coatings, and attached mixed materials may change what is accepted. Check local guidance and separate pieces where possible.
Final Thoughts
A cardboard box doesn’t ask much of us. It can become a house, a garden, or something only your child can explain, and that’s what makes these afternoons so enjoyable.
Give yourself permission to start small. Save one useful box, clear a little space, and see where your child’s imagination takes you.
There may be crooked windows, glue on the table, and a puppet that never gets its ears. There may also be a story you wouldn’t have heard otherwise, or a quiet moment of making something together.
Those are lovely things to keep, too.
For your next craft session, save one suitable item, choose one simple idea, and let your child decide what to add. Keep safety checks practical and enjoy the making as much as the finished creation.
For more inspiration for playful afternoons and everyday moments together, explore Tales of Tots. Your next shared adventure can start with something simple.
Resources
American Academy of Pediatrics: Nature Art, Outdoor Inspiration for Children
U.S. Consumer Product Safety Commission: Art and Craft Safety Guide
U.S. Environmental Protection Agency: Reduce, Reuse, Recycle